GGD Reader
This page will go over how to use the GGD Paraview plugin.
Tip
More information about the usage of specific plugin UI elements can be obtained by hovering the mouse over the element.
Supported IDSs
Currently, the following IDSs are supported in the GGD Reader.
edge_profilesedge_sourcesedge_transportmhdradiationrunaway_electronswallequilibriumdistribution_sourcesdistributionstftransport_solver_numericswavesplasma_profiles,plasma_sources,plasma_transport,
Loading an URI
If Paraview is correctly installed according to the installation docs, you should see the GGD reader plugin under Sources > IMAS Tools > GGD Reader. Selecting this source will create a GGD Reader source in the Paraview pipeline.
The first step is to select which URI you want to load. The GGD Reader provides three different methods of supplying an URI.
A string containing the URI.
A file browser with which you can select the file to load.
Manual selection of the backend, database, pulse, run, user, and version.
The different input options are shown in the figure below:
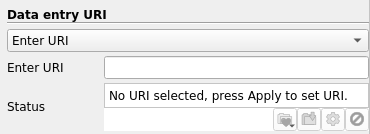
1. String input.¶ |
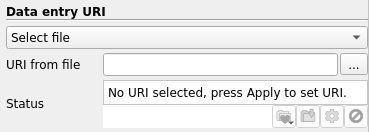
2. File browser.¶ |
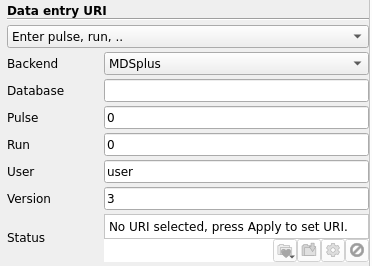
3. Manual input.¶ |
Loading an IDS
When the URI input is selected, and filled accordingly, you can press Apply to load the URI. If the URI loads successfully, an IDS can be selected from the drop-down list. The reader automatically detects which IDSs are available for the given URI, and only shows applicable IDSs for this plugin.
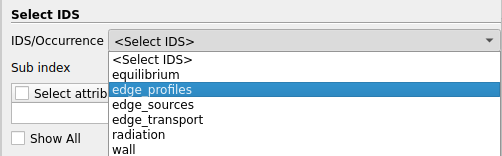
The drop-down list to select an IDS.
When the desired IDS is selected, click on Apply to load it. After the IDS is loaded,
the grid should appear in the viewport. If the grid does not show up, it is
possible that the axes are not aligned properly. You can use the buttons above to align your viewpoint
with the data. For example, to align the viewpoint in the positive Y direction, press:  .
.
You should now be able to see the mesh of the GGD.
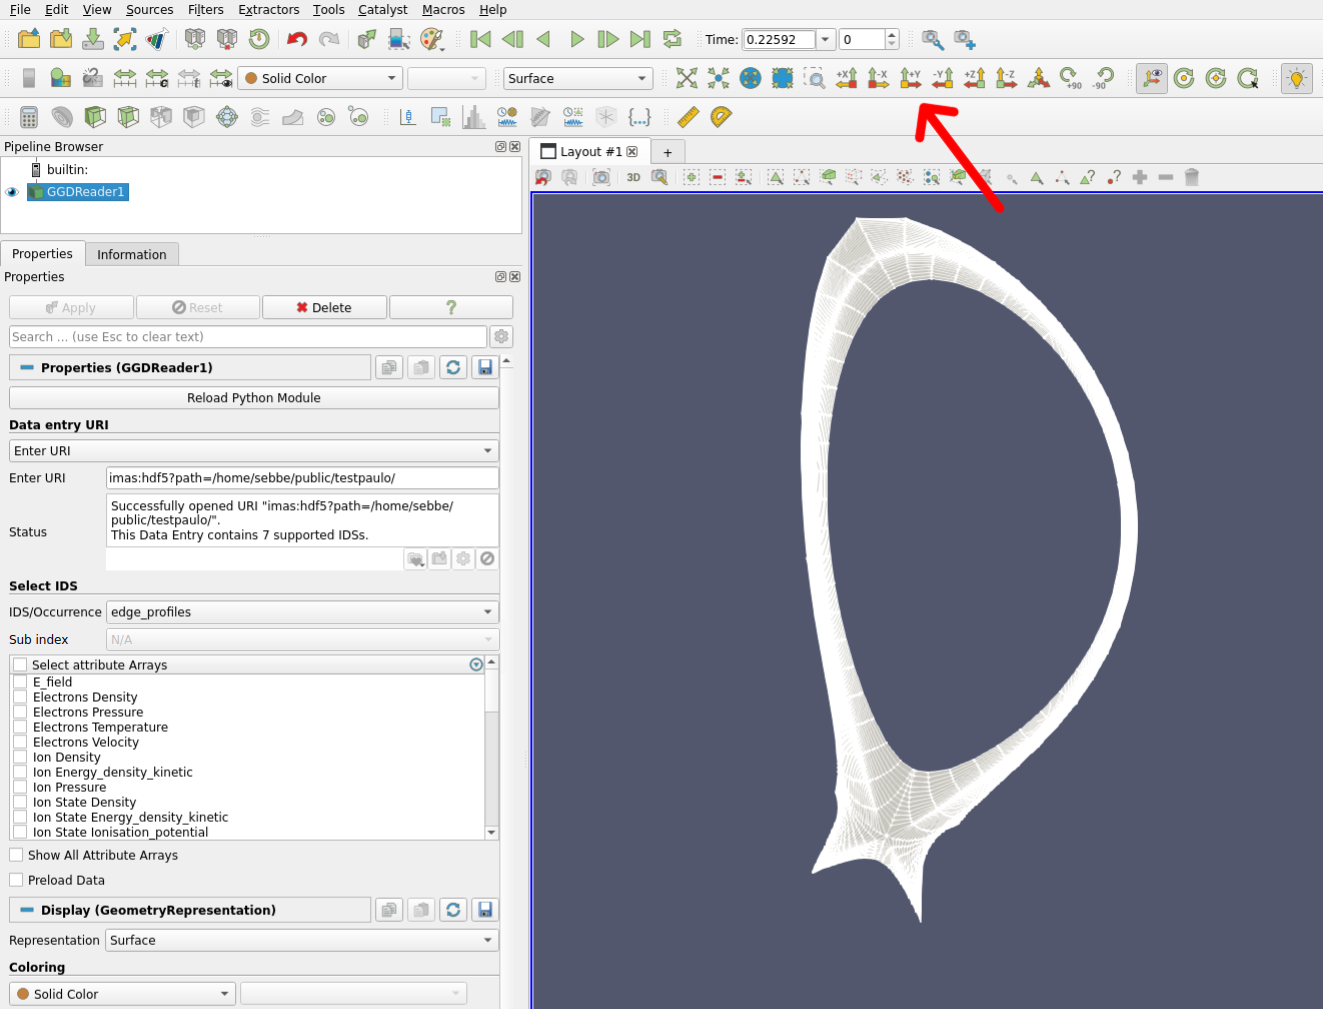
The mesh of the GGD.
Selecting GGD arrays
Attributes which are defined on the GGD grid can be loaded using the Attribute Selection window.
The selection window can be found on the left under Select attribute Arrays.
Any number of attributes can be selected, and the list
can be filtered using the ![]() -icon in the top right of the selection window.
When the attributes are selected, click on Apply to load the selected attributes from the backend.
The selected quantities can now be visualized using Paraview's selection drop-down menu.
-icon in the top right of the selection window.
When the attributes are selected, click on Apply to load the selected attributes from the backend.
The selected quantities can now be visualized using Paraview's selection drop-down menu.
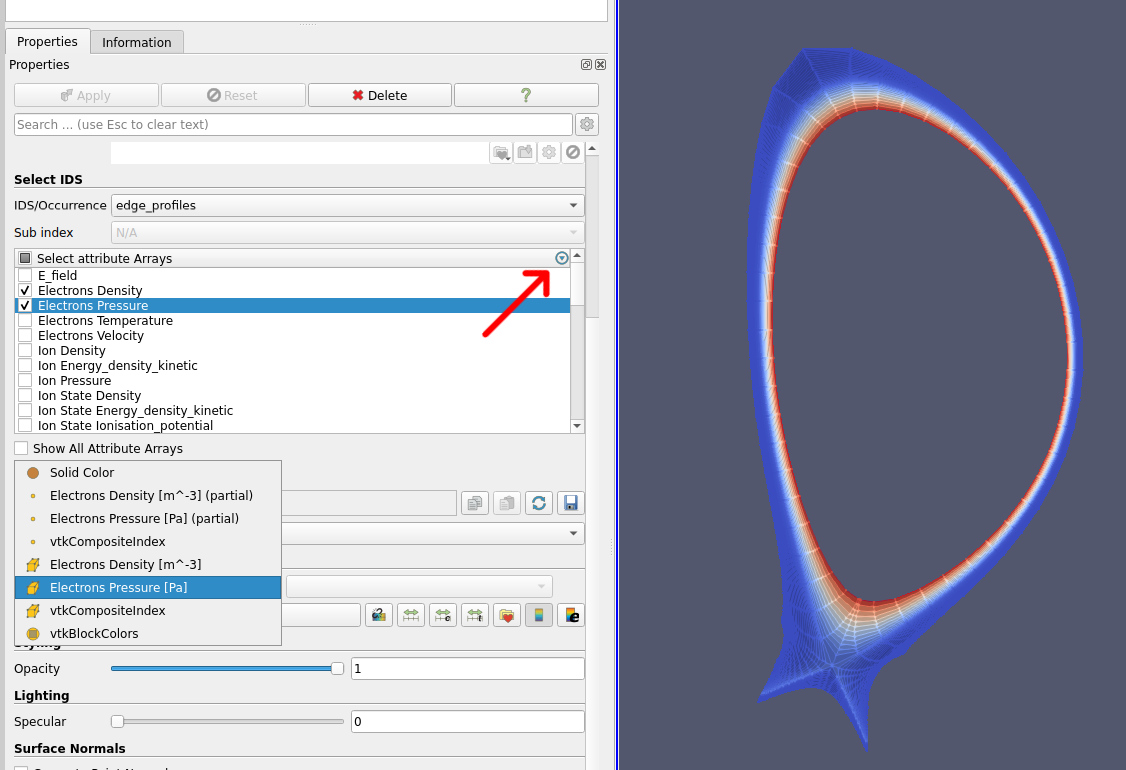
Visualize the Electron Pressure of the GGD.
Note
By default, the data is lazy loaded. This means that the data will only be fetched from the backend as soon it is required by the plugin. This helps loading times, as we don't need to fetch the entire dataset before handling any data. If you plan on loading the entire dataset, it may be beneficial to load all data up front. This can be done by enabling the Preload Data checkbox in the plugin settings.
Sub index
You may have noticed the greyed-out dropdown labeled "Sub index" in the previous sections. This dropdown allows you to select different parent structures that may contain a GGD grid, but only applies to some IDSs.
One of these IDSs is the wall IDS, where the GGD grids are defined inside the
description_ggd array. You can use this dropdown to select which array element
should be visualized:
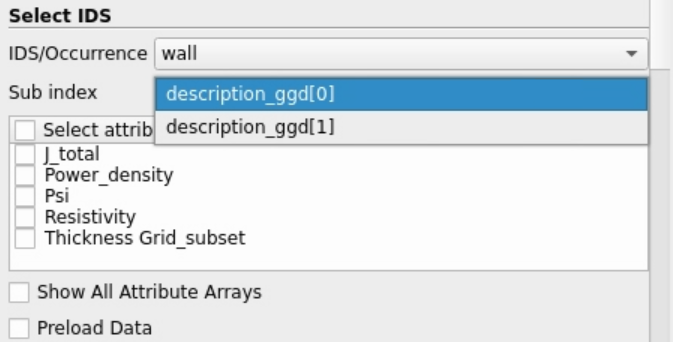
Choose between visualizing the grid from description_ggd[0] or
description_ggd[1]. The meaning of the different indices is dependent on the data
provider.